Getting started
Quickstart
Saldek prepares your bookkeeping entries. Upload a document, let Saldek extract its details and draft the entry, then check and approve it. Follow these steps to get started.
What you need
- An account: Sign up with your business e-mail address and verify it. Saldek does not accept addresses from disposable e-mail services.
- A sample document: An incoming invoice or receipt in PDF, JPG, PNG, or HEIC format, up to 25 MB per file.
Create your first booking in five steps
- Create an account and set up your organization: When you sign up, enter your name, business e-mail address, a password, your organization’s name, your country, and your language, then verify your e-mail address with the link in your inbox. When you first sign in, the setup wizard takes you through “Company”, “Business and taxes”, “Currency and fiscal year”, “Chart of accounts”, and “First documents”. Your trial with all features starts when you sign up.
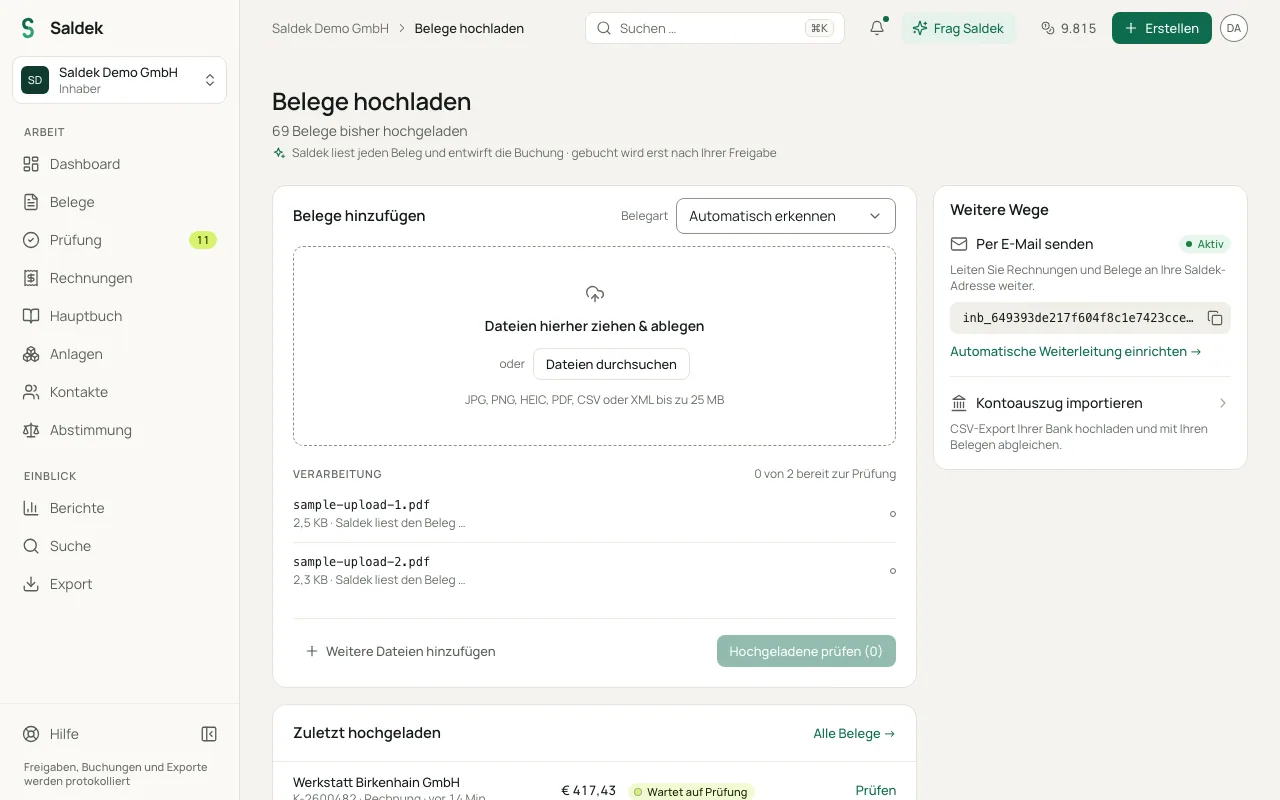
- Open “Upload documents”: Select “Create” › “Upload document” at the top, or the “Upload document” button on the “Documents” page. Then drag your file into the upload area or choose “Browse files”.
- Wait for Saldek to process the document: Saldek extracts the vendor, date, amounts, tax rates, and line items, then prepares a booking. Track progress in the processing queue.
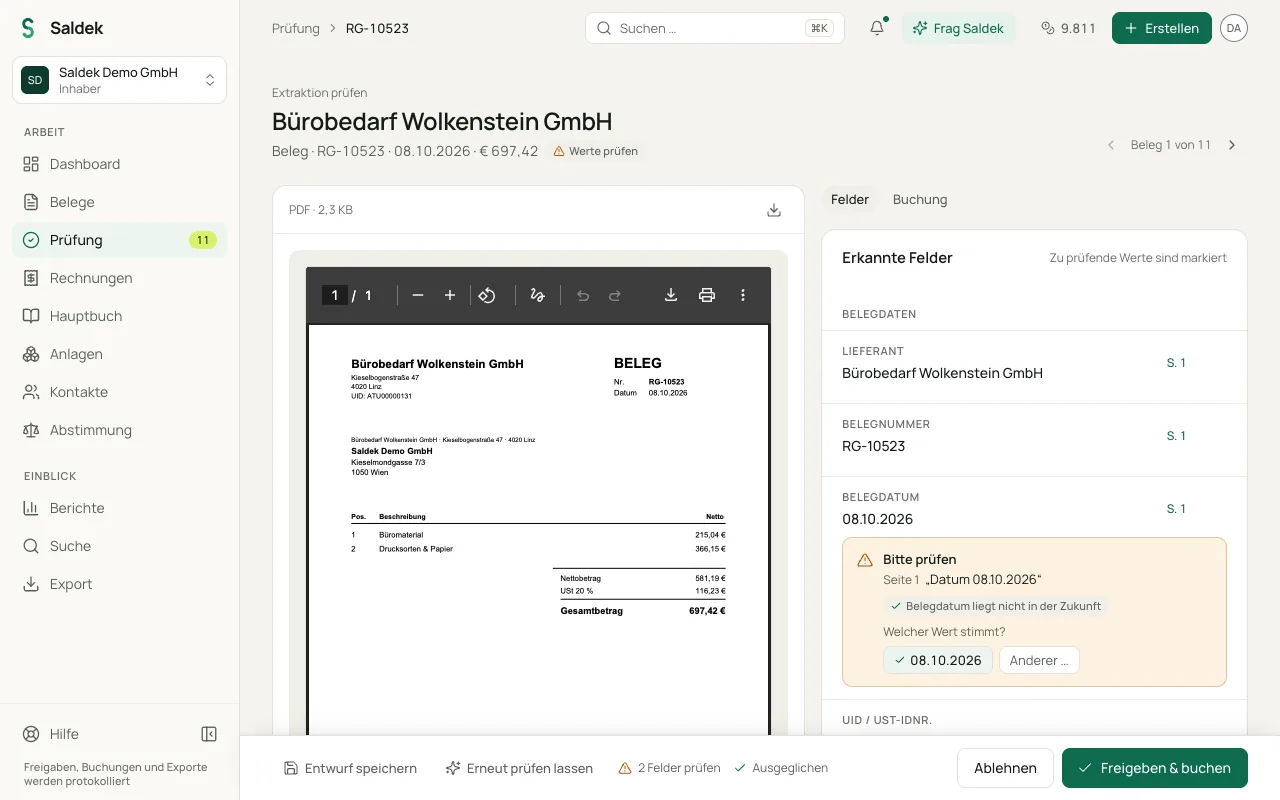
- Check the document under “Review”: Open it to compare the original with the extracted fields. Saldek marks the values you should check. Correct any errors.
- Approve the booking: Select “Approve & post”. Saldek then adds the entry to the ledger.
Finish the setup later
Every step of the setup wizard offers “Finish later”. After that, signing in takes you to the “Dashboard”, where the “Setup” section leads you back to the wizard with “Do it now” until you finish it. The person who created the organization goes through the wizard; invited members go straight to the “Dashboard”.
Next steps
- Send documents without uploading them: Forward them to your inbound address, or import them from your mailbox or Google Drive. These options are available with the Starter plan or higher.
- Create your own invoices and issue them as e-invoices.
- Import a bank statement and match its payments.
- Export data for your tax advisor.
Frequently asked questions
Do I need a credit card for the trial?
No. After you register, you get 30 days of access to all features with included credits and no credit card. After the trial, choose a plan; without a plan your account stays readable and exportable.
Does Saldek post bookings automatically?
No. AI creates suggestions only. A person with the required role must approve a booking before Saldek posts it.
Which file types can I upload?
JPG, PNG, HEIC, PDF, CSV, or XML files, such as an e-invoice, up to 25 MB per file.
Can my tax advisor work with me in Saldek?
Yes. Invite them with the “Accountant” role. They can view approved bookings and their source documents, then export them.
Can I finish the setup later?
Yes. Select “Finish later” in any step of the setup wizard. The “Setup” section on the “Dashboard” takes you back until your setup is finished.
Last updated: